

A puddle under the pump. A slow drip from the stuffing box. A spray of water across the motor coupling. Mechanical seal leakage in water pumps is the single most common reason maintenance teams get called to the pump house — and it is also the most misunderstood. Many technicians reach for a wrench and tighten the gland bolts, convinced that more compression will stop the leak. In reality, over-tightening is one of the fastest ways to destroy a mechanical seal completely.
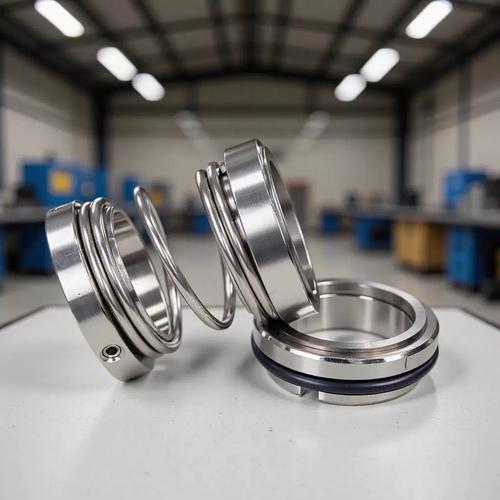
At NINGBO MIAOYU MACHINERY TECHNOLOGY CO., LTD., we manufacture cartridge seals, O-ring pusher seals, and metal bellows seals as OEM equivalents for John Crane, Burgmann, AESSEAL, Flowserve, and Grundfos. Every month we analyze failed seals returned from water treatment plants, HVAC systems, booster pump stations, and irrigation lines. The same patterns repeat. This guide breaks down the real causes of water-pump seal leakage, how to diagnose them on the spot, and what to do to get the pump back online fast — without creating a bigger problem.
A mechanical seal does not "wear out" the way a tire wears. It relies on a microscopic fluid film — measured in microns — between two ultra-flat lapped faces. As long as that film is stable, the seal leaks nothing. Leakage begins the moment something disrupts that film: the faces are forced out of parallel, the film vaporizes, abrasive particles embed in the carbon face, or the secondary elastomer fails. Understanding which of these four categories your leak falls into determines whether you fix it in 20 minutes or condemn the pump for a full rebuild.
What happened: The pump lost prime. Air entered the seal chamber, the fluid film between the faces flashed to vapor, and the carbon rotary face overheated. Within seconds, the carbon develops heat-check cracks or a blistered surface. Once the carbon face is damaged, no amount of tightening will stop the leak.
How to fix it fast:
Do not tighten the gland. The faces are already destroyed; compression only makes things worse.
Shut down the pump immediately. Running a dry seal for more than 30 seconds guarantees failure.
Re-prime the pump and open the highest vent on the stuffing box to purge all air.
If the leak persists after restart, the seal faces are damaged. Replace the seal cartridge or the rotary and stationary faces.
Prevention: Always verify the pump is fully primed before startup. For applications with frequent start-stop cycles (booster pumps, fire pumps), specify a John Crane 58U-style cartridge or Miaoyu MY-58U with a carbon vs SiC face pair and an EPDM or FKM O-ring. The balanced design tolerates minor vapor pockets better than unbalanced seals.
What happened: Sand, silt, rust flakes from old piping, or calcium scale entered the seal chamber and became trapped between the lapped faces. Each revolution grinds the carbon face, widening the leakage path. This is the most common failure mode in well water, river intake, and untreated cooling tower systems.
How to fix it fast:
Shut down and disassemble the seal chamber.
Inspect the carbon face under a bright light. If you see a visible wear track or scoring, the carbon must be replaced.
Flush the stuffing box, impeller, and suction piping with clean water to remove all settled solids.
Replace the seal. For ongoing abrasive service, upgrade to a Tungsten Carbide vs Silicon Carbide face pair — TC resists abrasive wear far better than carbon.
Prevention: Install a suction strainer (40–60 mesh) upstream of the pump. For severe abrasive duty, specify a double cartridge seal with a clean water barrier fluid (API Plan 53A), or at minimum a single cartridge with a flush connection (Plan 32) to keep solids away from the faces.
What happened: The discharge piping was forced onto the pump flange instead of being naturally aligned. The resulting pipe strain distorts the pump casing, shifting the stuffing box out of square with the shaft. The stationary seat tilts relative to the rotary face, breaking the sealing interface. This is a classic "new seal, same leak" scenario.
How to fix it fast:
Loosen the discharge flange bolts. Check if the pipe drops naturally onto the pump flange. If not, the piping must be re-supported or re-cut.
With the flange bolts loose, re-torque the gland bolts in a star pattern to the seal manufacturer's specification.
Tighten the flange bolts evenly.
If the leak stops, pipe strain was the entire problem. The old seal may still be usable if the faces were not damaged during the misaligned run.
Prevention: Never pull piping into alignment with flange bolts. Always use pipe hangers and supports so the pump flange and pipe flange are concentric with zero force. After installation, verify with a feeler gauge that the gland plate sits flush on the stuffing-box face on all sides.
What happened: The secondary O-ring that seals the rotary assembly to the shaft has hardened, swollen, or developed a compression set. In water service, EPDM is the standard elastomer, but if the water contains traces of oil, solvents, or chlorine, the O-ring degrades. A cut or nicked O-ring during installation is another common cause — even a tiny slice allows water to bypass the faces entirely.
How to fix it fast:
Disassemble the seal. Inspect the O-ring on the rotary sleeve for cuts, swelling, or flattening.
If damaged, replace the O-ring with the correct material. For potable water: EPDM. For water with trace hydrocarbons: FKM (Viton®). For high-temperature water (>120 °C): consider a PTFE wedge or upgrade to a metal bellows seal.
During reassembly, lubricate the O-ring with a compatible lubricant — silicone grease for FKM, vegetable-based soap solution for EPDM. Never use petroleum grease on EPDM.
Prevention: Always verify elastomer compatibility with the actual fluid, not just "water." Many municipal water supplies contain chlorination byproducts that attack standard NBR. EPDM is the safe default for clean water. For hot water above 120 °C, step up to a Burgmann H7N or Miaoyu MY-H7N metal bellows cartridge, which eliminates the dynamic O-ring entirely.
What happened: One of three installation errors:
Setting clips not removed: The clips that lock factory spring compression were left in place. The faces are not loaded against each other.
Drive collar set screws not tightened: The rotary assembly spins on the shaft instead of with it.
Gland bolts over- or under-tightened: Uneven torque cocks the stationary seat.
How to fix it fast:
Shut down and inspect. If the setting clips are still present, remove them — but check first whether the faces have been damaged by running unloaded. If the carbon shows heat marks, replace the seal.
Verify the drive collar set screws are tightened to specification in a crisscross pattern.
Re-torque the gland bolts in a star pattern: 30% → 60% → 100% of specified torque.
Prevention: Follow the cartridge seal installation sequence exactly: slide on → hand-tighten gland → torque gland in star pattern → tighten collar set screws → remove setting clips last. A one-page checklist taped inside the pump house prevents most of these errors.
| Symptom | Most Likely Cause | Immediate Action |
|---|---|---|
| Sudden leak + chirping noise | Dry running / vaporization | Stop pump, re-prime, replace if faces damaged |
| Gradual drip + cloudy water | Abrasive particles | Flush system, replace faces, upgrade to TC/SiC |
| Leak right after new seal install | Pipe strain or misalignment | Check flange alignment, re-torque gland |
| Slow weep over months | O-ring degradation | Replace elastomer, verify material compatibility |
| Leak on startup with new cartridge | Installation error | Check clips, set screws, gland torque |
Carbon face lightly scored, other parts good: Replace the rotary face only. Cost-effective for larger shafts (≥45 mm).
Both faces damaged, O-ring good: Replace the face pair. Suitable for non-cartridge seals where parts are available separately.
Elastomer swollen or cut, faces OK: Replace the O-ring or full rotary assembly. Cheap fix if caught early.
Any heat-check cracking on carbon, or chipped SiC: Replace the full cartridge. The damage is irreversible.
Most water pumps use one of these standard shaft sizes: 20 mm, 25 mm, 30 mm, 35 mm, 40 mm, 45 mm, 50 mm, 55 mm, 60 mm. Common pump models and their seal requirements:
Grundfos CR/CRI: 12 mm, 16 mm, 22 mm, 28 mm, 32 mm — use Miaoyu MY-GF-CR cartridge series
Lowara CEA/CO: 16 mm, 20 mm, 25 mm, 32 mm — use Miaoyu MY-58U or MY-M03S
KSB Etanorm: 35 mm, 45 mm, 55 mm, 70 mm — use Miaoyu MY-M7N or MY-58U
Wilo Stratos/Helix: 24 mm, 28 mm, 32 mm, 42 mm — use Miaoyu MY-58U or MY-H7N for hot water
When ordering a replacement, provide: pump model, shaft diameter, fluid (cold water, hot water, chlorinated, dirty), temperature, and pressure. NINGBO MIAOYU MACHINERY TECHNOLOGY CO., LTD. returns a confirmed part number and price within 24 hours, with worldwide shipping from Ningbo.
Most mechanical seal leaks in water pumps are preventable. Dry running, abrasives, pipe strain, elastomer failure, and installation errors account for over 90% of all failures. Diagnose the cause before touching a wrench — tightening a gland bolt on a dry-run-damaged seal or a misaligned pump only makes things worse. Replace the seal with a quality cartridge from a manufacturer that provides dimensional interchange, material certification, and engineering support.
Need help identifying the right replacement seal for your water pump? Send a photo of the existing seal tag, the pump nameplate, and the shaft diameter to the Miaoyu team. You will receive a cross-reference to the correct cartridge — John Crane, Burgmann, AESSEAL, Flowserve, or Grundfos equivalent — with a formal quotation and delivery schedule.
Add: No8-2, Jinsha Road, Yuelin Street, Fenghua District, Ningbo, Zhejiang, China
Tel: +86-18758835650 | WhatsApp: +86-18758835650
Target keywords: mechanical seal leakage, water pump seal leak, cartridge mechanical seal, John Crane 58U, Burgmann M7N, Grundfos CR seal, dry running seal, pipe strain seal failure, O-ring degradation

Our company is specialized in the production of sealing materials, mechanical seals , cartridge seals.
E-mail: gechacha@aliyun.com
Mobile: +86-18758835650
WhatsApp: +86-18758835650
Add: No8-2, Jinsha road Yuelin Street, Fenghua District, Ningbo, Zhejiang


