

A cartridge mechanical seal is supposed to make life easier. Pre-assembled on a sleeve, pre-set spring compression, setting clips holding everything square — in theory you just slide it on, bolt the gland, tighten the collar set screws, pull the clips, and run. In practice, a frightening share of "brand-new seal leaked in the first shift" cases trace back to the same handful of installation errors. At NINGBO MIAOYU MACHINERY TECHNOLOGY CO., LTD. we see the post-mortems every month: a John Crane 58U-style cartridge, a Burgmann M7N equivalent, an AESSEAL M03S interchange, or our own Miaoyu MY-CART series — all precision-lapped to within microns, all killed in the field by a greasy shaft or a forgotten spacer.
This guide walks through the correct sequence for a standard single cartridge mechanical seal (O-ring or PTFE wedge secondary) on an ANSI/DIN centrifugal pump, then calls out the five mistakes that account for most infant-mortality failures.
Calibrated torque wrench, dial indicator, feeler gauge
Non-metallic driver / cardboard face protector (never strike the lapped face with steel)
Compatible lubricant: silicone grease or soap solution for FKM/EPDM, vegetable oil for EPDM, never petroleum grease on EPDM, never silicone on FKM unless specified
Lint-free wipes, isopropyl alcohol or acetone for face wipe-down
The manufacturer's drawing for that exact model — John Crane 58U, Burgmann M7N, Flowserve 5600, Grundfos CR cartridge, or Miaoyu MY-58U / MY-M7N / MY-606. Model-specific set-clip location and collar gap differ.
Leave the setting clips and spacers in place. Check the shipping carton, then the assembly: no chipped SiC or carbon face, no displaced O-ring, gland gasket seated, set screws backed off clear of the sleeve bore. If the lapped face has a hairline from a dropped box, do not install it.
Shaft runout (TIR) must be ≤0.05 mm (0.002") per API 610 practice; stuffing-box face flat and square to shaft within 0.025 mm. Deburr keyways, snap-ring grooves, and cross-holes — those edges slice an O-ring instantly. Finish the shaft/sleeve to Ra 0.2–0.4 µm. Wipe with alcohol; no fingerprints on the face.
Thin film of compatible lube on shaft, sleeve O-ring, and elastomer contacts. "Sparingly" matters — excess lube drags grit into the faces. Petroleum jelly on an EPDM O-ring = swollen, locked rotary, immediate failure.
Guide the gland bolt holes to the stuffing box studs. If it binds at a keyway, stop. Cover the sharp edge with shim stock or PVC tape and re-slide. Never hammer the gland. Rotate the shaft by hand as you push to keep the sleeve O-ring from rolling.
The gland plate must sit flat on the stuffing-box face with no visible gap on any side. Hand-tighten the gland nuts first.
Three-pass sequence: 30% → 60% → 100% of spec torque, alternating 180°. Over-torquing one bolt cocks the stationary seat by microns — enough to break the fluid film. Two-bolt glands are the worst offenders.
Tighten evenly, alternating opposite screws, to the drawing torque. This locks factory spring compression onto the shaft. Do this before removing any clip.
Once the gland is torqued and the collar is locked, pull the metal setting clips or spacers. They are reusable — label and keep them. Removing them early releases spring load and destroys the pre-set working length.
Align motor to pump coupling, then check pipe strain: with the pump nozzle flanges loose, the mating pipe flange should drop onto the pump flange without pulling. Forcing misaligned piping distorts the casing and the stuffing box runs eccentric to the shaft.
Fill the casing and seal chamber with the correct fluid or flush (API Plan 11/21/32 as specified). Open the highest vent on the stuffing box until liquid runs clear — no air pocket against the faces. Jog the motor briefly, confirm free rotation, then run at low pressure for 30 minutes and watch for heat, noise, or seepage.
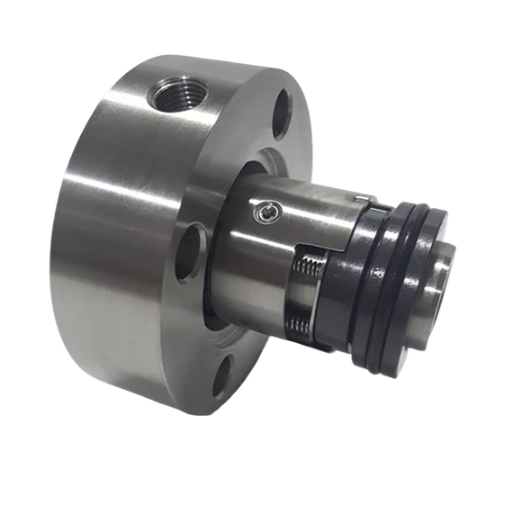
A Miaoyu MY-58U (John Crane 58U equivalent) at 35 mm shaft, or a MY-M7N (Burgmann M7N equivalent) at 45 mm, or a MY-606 bellows cartridge for hot-oil duty at 50 mm, all ship with a drawing that fixes: setting length from gland reference to face, collar gap, set-screw torque, and clip position. Those numbers are not suggestions. A 1/16" error in setting length on a component seal would be fatal; on a cartridge the clip protects you — if you leave it in until step 8.
Add: Building 2, No. 188 Huiyuan Road, Xiepu Town, Zhenhai District, Ningbo City, Zhejiang Province, China
Tel: +86-574-86688829 | Email: sales@miaoyuseals.com
Target keywords: cartridge mechanical seal installation, John Crane 58U cartridge install, Burgmann M7N setting clip, mechanical seal setting clip removal, O-ring cut during seal install, pipe strain mechanical seal, high temperature cartridge seal China


Our company is specialized in the production of sealing materials, mechanical seals , cartridge seals.
E-mail: gechacha@aliyun.com
Mobile: +86-18758835650
WhatsApp: +86-18758835650
Add: No8-2, Jinsha road Yuelin Street, Fenghua District, Ningbo, Zhejiang


